
Knee X-ray anatomy, views and key alignment checks
The knee is the largest joint in the body and one of the most commonly injured. Knee X-Rays are usually the first-line investigation worldwide, but subtle fractures, avulsions and patellar variants can be difficult to detect on plain films. Understanding knee X-Ray anatomy, key views and a structured review approach is essential to assess alignment, joint spaces and important injuries.
The knee is the largest synovial joint in the body, designed to provide stability in weight-bearing while allowing a wide range of flexion and extension. It is a complex hinge joint formed by the distal femur, proximal tibia, and patella, with numerous ligaments and soft tissue stabilisers.
The knee comprises three articulations:
X-Rays are widely used for joint space assessment, subchondral sclerosis, and osteophytes all signs of degenerative disease. MRI is the gold standard for cartilage and meniscal evaluation.
The cruciate ligaments lie within the intercondylar region of the knee and cross over one another, forming the central stabilisers of the joint.
ACL (anterior cruciate ligament): Runs from the anterior intercondylar area of the tibia to the posterior part of the inner surface of the lateral femoral condyle. It prevents anterior translation of the tibia relative to the femur. Best assessed on MRI, although radiographs may show indirect signs such as a Segond fracture.
PCL (posterior cruciate ligament): Runs from the posterior intercondylar area of the tibia to the anterior part of the inner surface of the medial femoral condyle. It prevents posterior translation of the tibia. Like the ACL, it is best visualised on MRI; avulsion fractures of the tibial insertion may occasionally be seen on plain films.
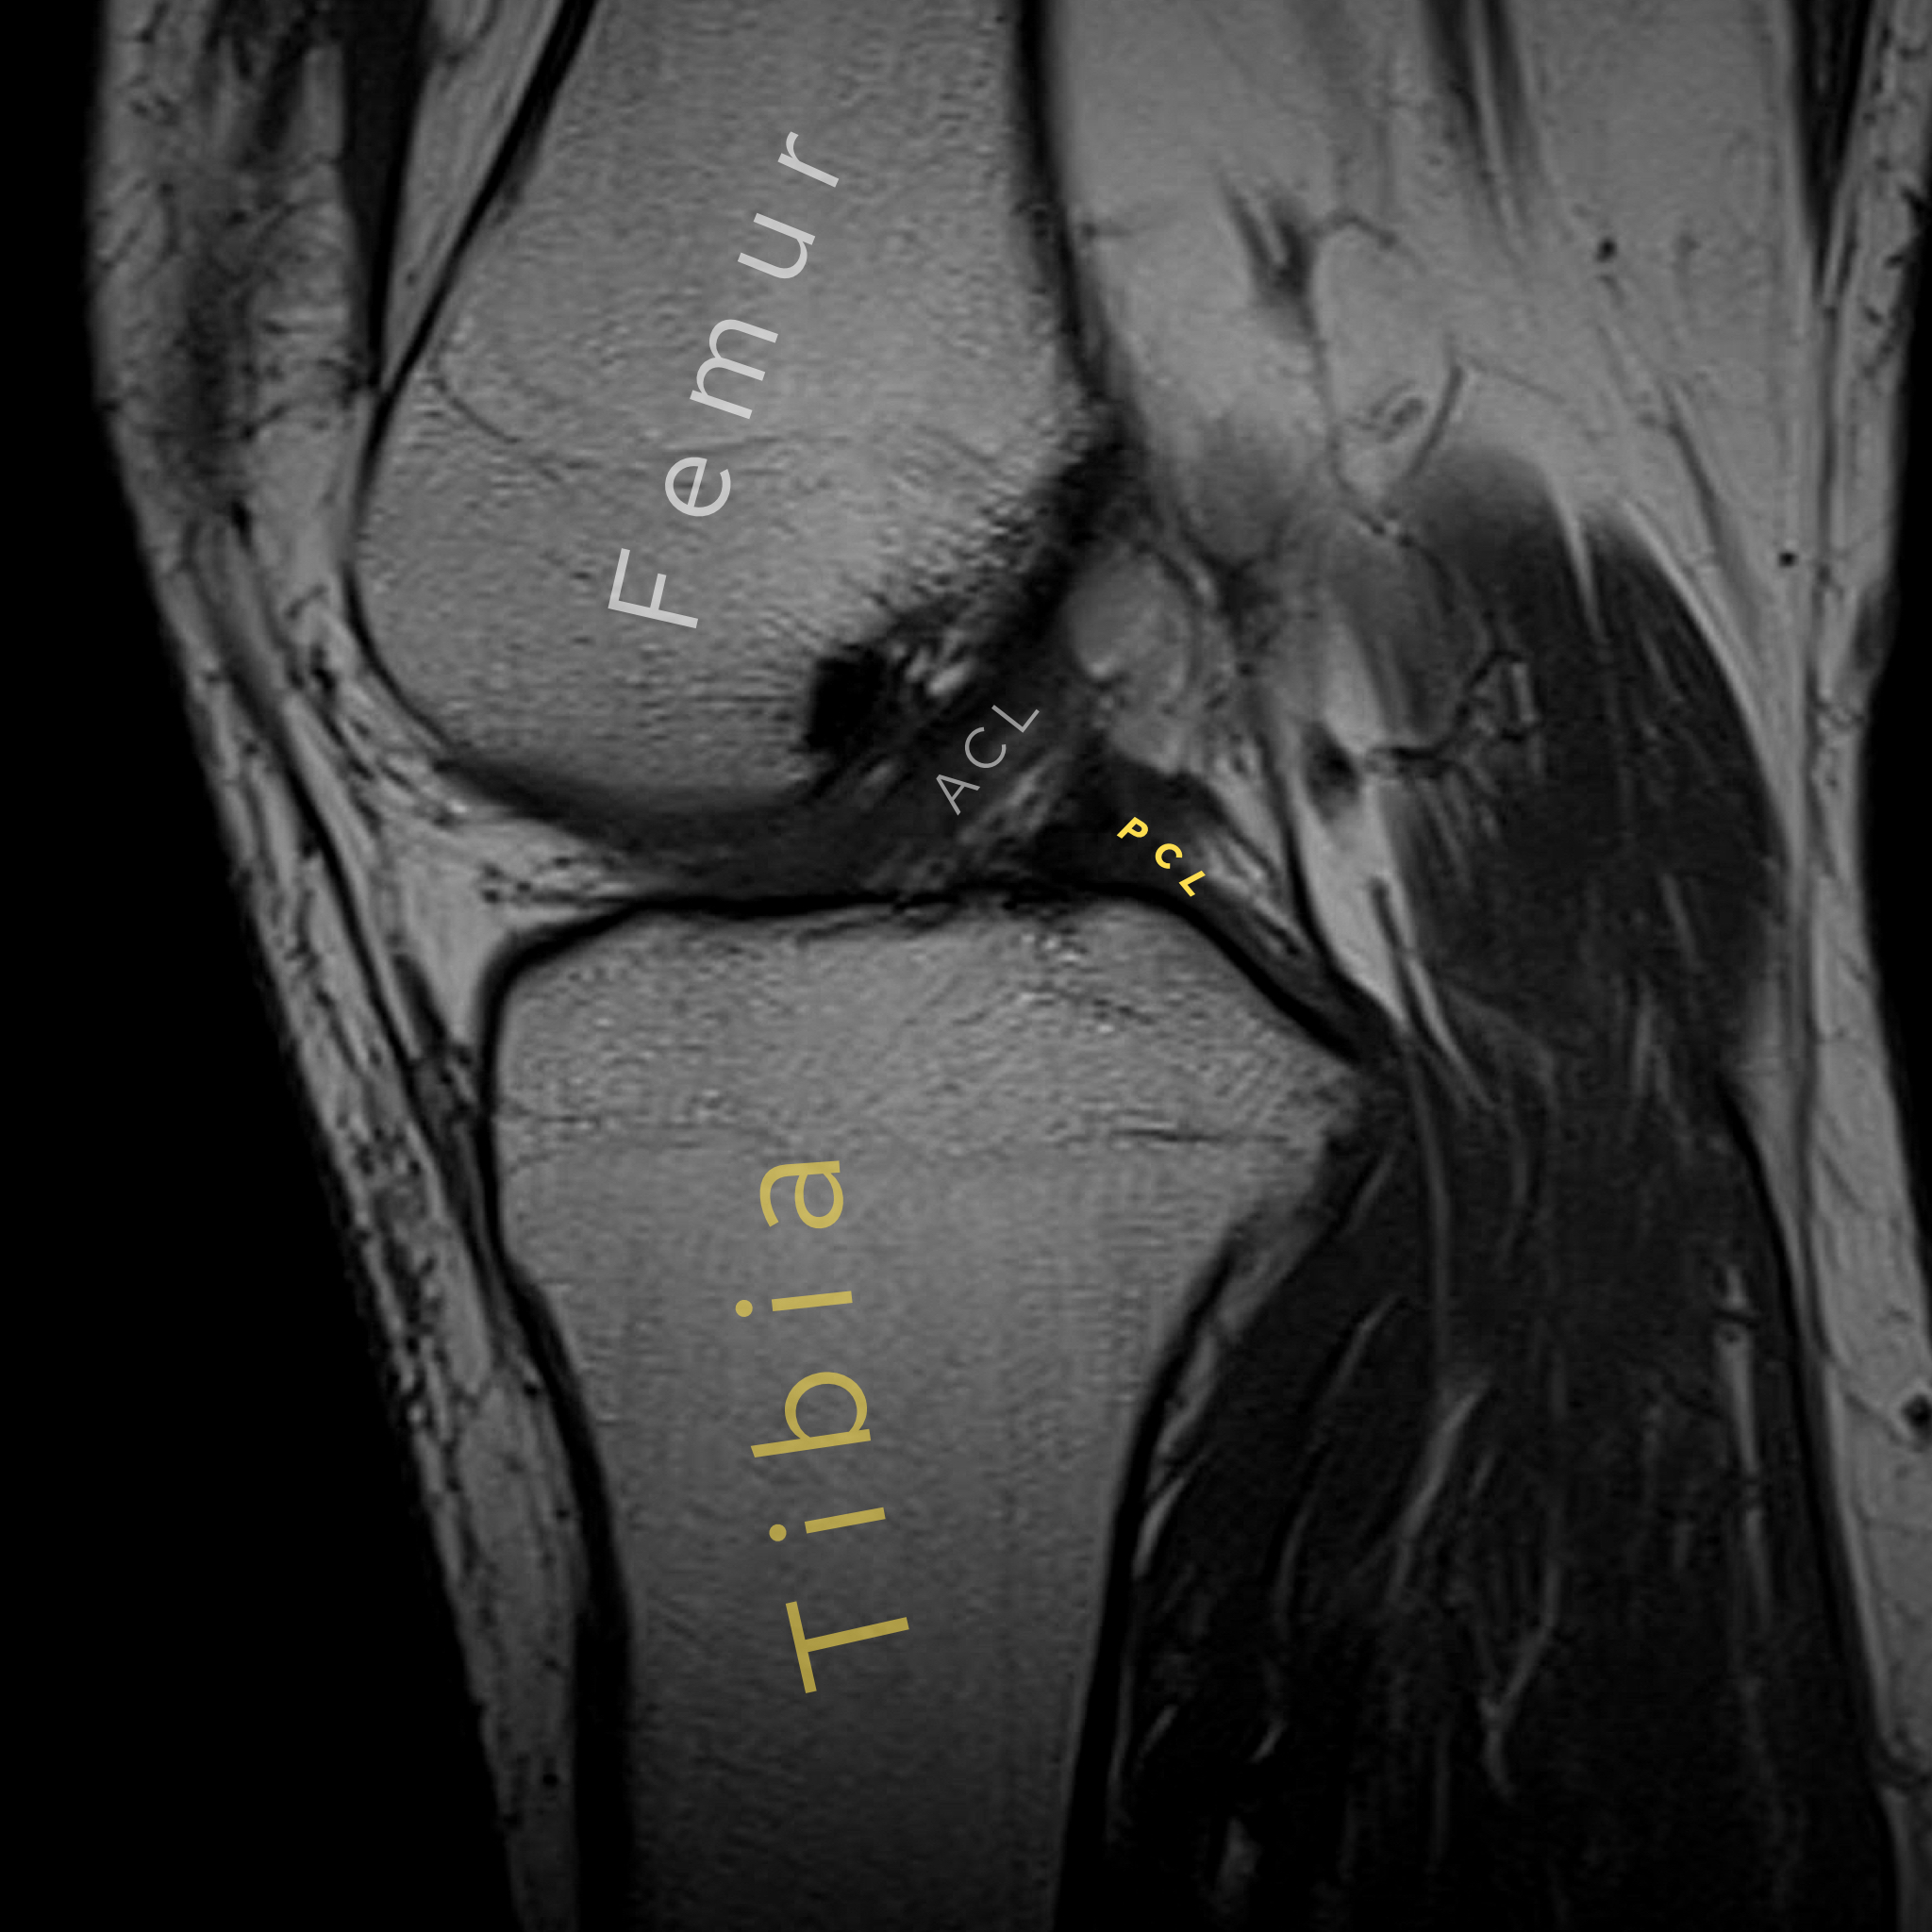
The cruciate ligaments as seen on MRI.
The collateral ligaments stabilise the knee in the coronal plane and resist varus–valgus stress.
MCL (medial collateral ligament): Runs from the medial femoral epicondyle to the medial tibial condyle and proximal tibial shaft. It also has deep fibres that blend with the medial meniscus. It prevents valgus angulation of the knee.
LCL (lateral collateral ligament): Runs from the lateral femoral epicondyle to the head of the fibula. It is a cord-like structure that resists varus angulation and does not attach to the lateral meniscus.
On plain films, ligament injuries are rarely directly visible but may be suggested by avulsion fragments. MRI provides direct visualisation.
The AP view can be considered the primary view, but as in all of radiology, one view is considered no view, so it needs to be reviewed with supplementary views. A lateral view, in the context of trauma, is usually obtained with the patient lying down supine with a horizontal X-ray beam, the so-called HBL view. This is quite useful for picking up lipohemoarthrosis, which we’ll go on to in some detail below.
Other views that may be used are the oblique view and a skyline view: the latter can be useful in demonstrating patellar injury or patellofemoral arthritis.
Let’s go through the AP view in more detail:
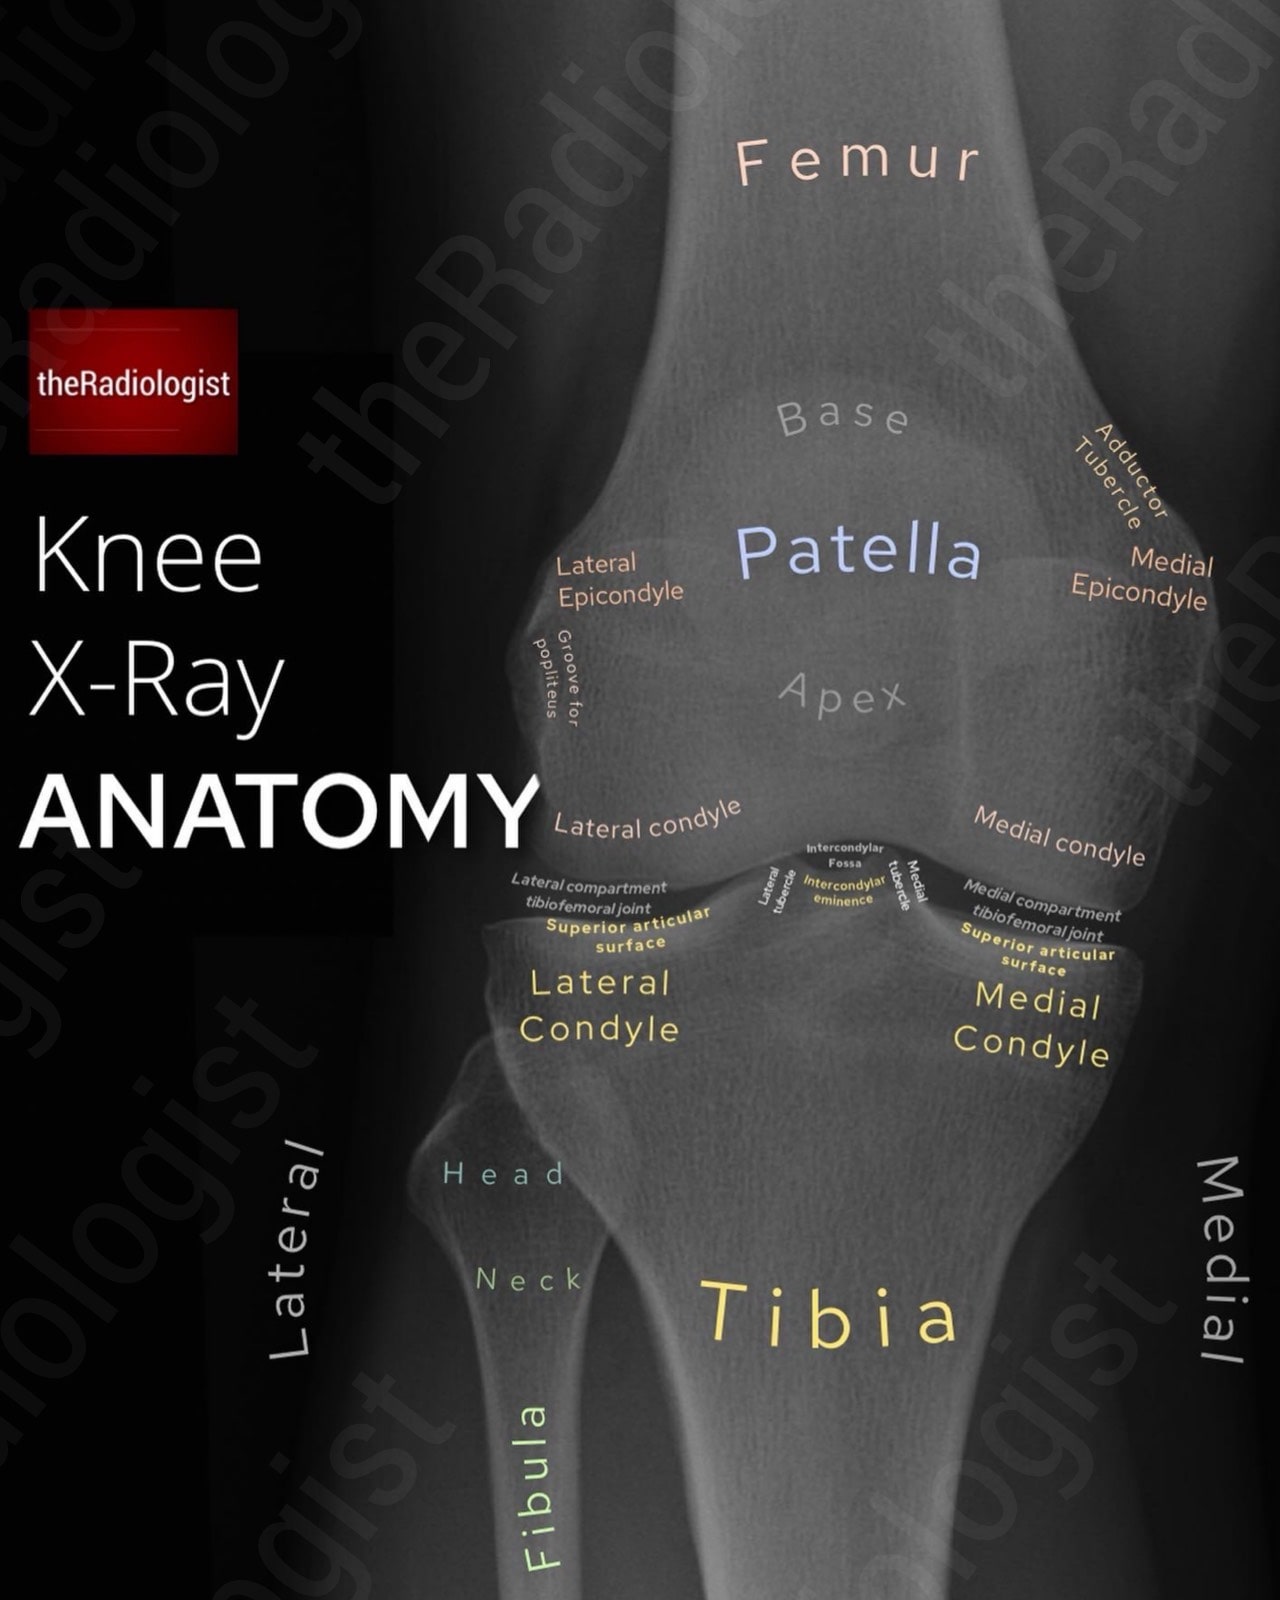
Annotated view of an AP knee X-Ray.
Start by orientating yourself, identifying which side is lateral by looking at which side the fibula lies on – this marks out the lateral side of the knee.
Look for any soft tissue swelling or gas locules, which can help you find the site of the injury and help hone your review. Effusions are better depicted on a lateral view.
Look for calcification within the joint space which can represent chondrocalcinosis. Calcification adjacent to the medical epicondyle of the femur usually isn’t acute: this can represent a Pellegrini-Steida lesion (calcification of the medial collateral ligament following an old injury).
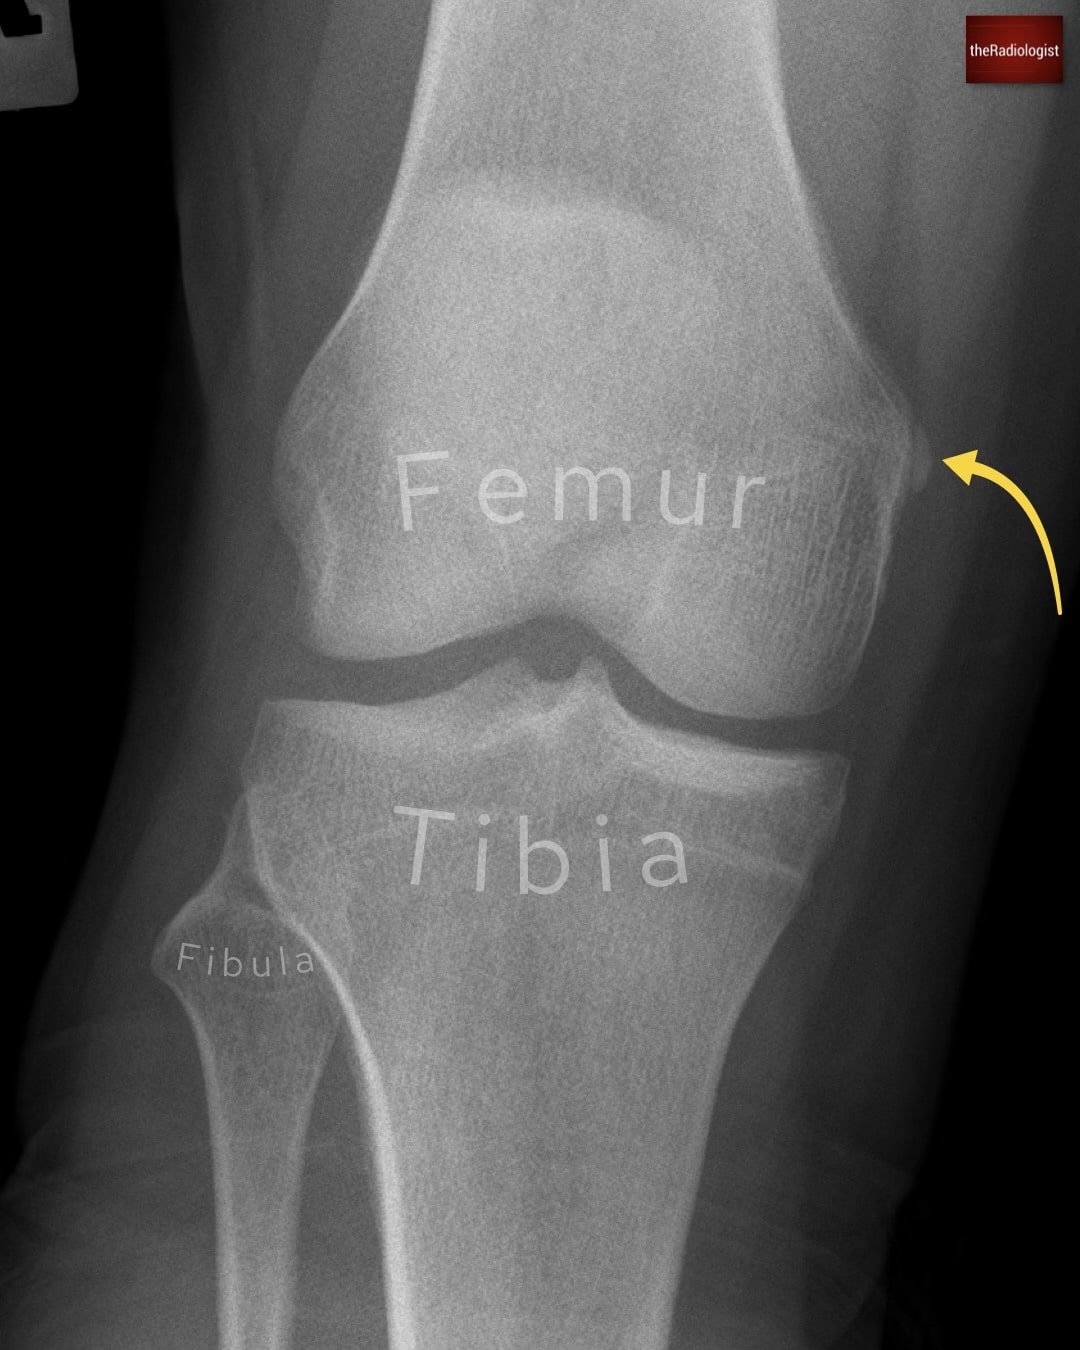
Look adjacent to the medial epicondyle for a focus of calcification: this could represent a Pellegrini-Steida lesion which is a sign of a previous medial collateral ligament injury.
Calcification adjacent to the medial epicondyle of the femur should make you think about a Pellegrini-Steida lesion. This represents calcification of the medial collateral ligament after an old injury.
Draw a vertical line down the most lateral margin of the femur. You should only see a maximum of 5 mm of the tibia to the lateral aspect of this line. If there is more than this, ie. there’s too much of the tibia that’s lateral, then suspect a fracture of the lateral tibial plateau.
Compare the medial and lateral joint spaces: any narrowing/asymmetry may suggest osteoarthritis, meniscal injury, ligamentous laxity, or subtle plateau injury.
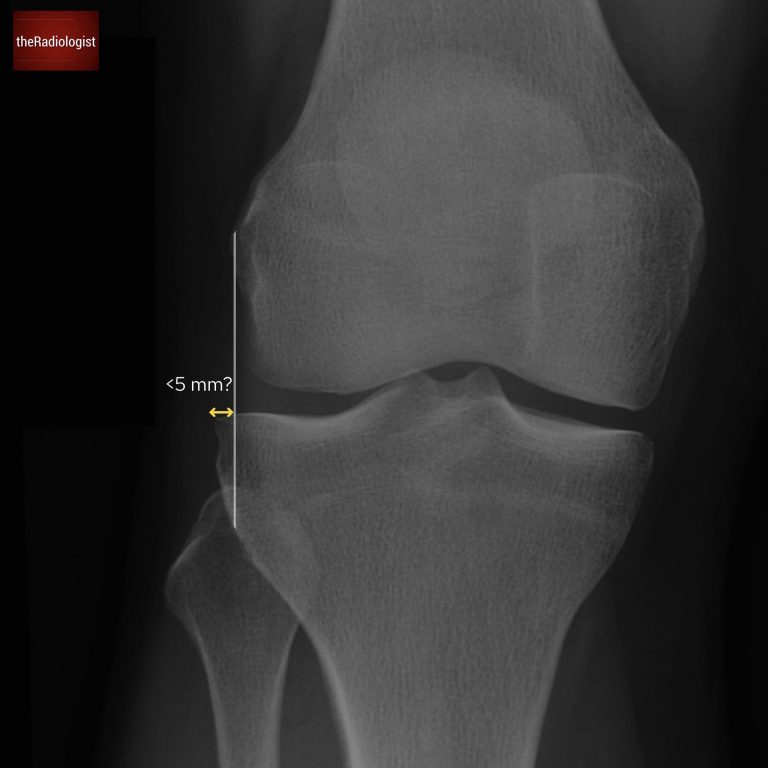
Draw a line down from the most lateral margin of the femur and you should only see a maximum of 5 mm of the tibia lateral to this line.
The tibial plateau involves the articular surfaces of the medial and lateral tibial condyles and the central intercondylar eminence. Fractures of this region most commonly affect the lateral tibial plateau so look closely here. These fractures may be subtle and can present as just a faint sclerotic line due to overlapping bone so zooming in can help. If in doubt oblique views or CT can help.
Analyse the intercondylar eminence making sure there is not a subtle avulsion fracture – this can suggest an anterior cruciate ligament injury (this originates anterior to the intercondylar eminence).
A Segond fracture is another sign of an ACL injury, here you are looking for a bone fragment lateral to the lateral tibial plateau, above the fibula head and just below the joint line.
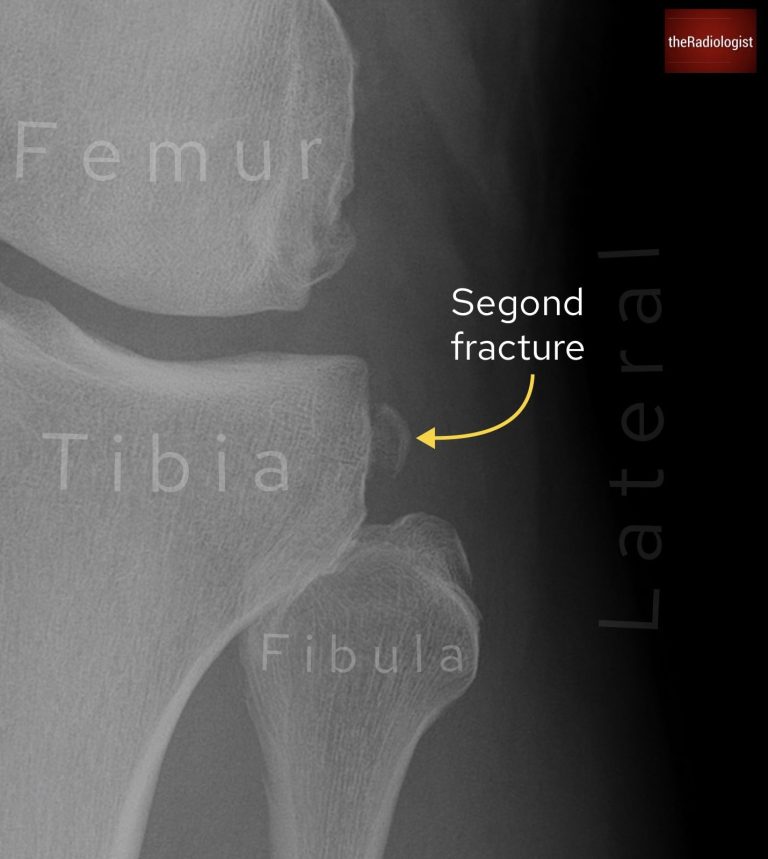
If you see a bone fragment above the fibula this could represent a Segond fracture which is a sign of an ACL injury.
A lateral tibial plateau avulsion fracture is known as a Segond fracture and is a sign of an ACL injury.
A medial tibial plateau fracture can be a sign of a PCL or medial meniscus injury and has been termed a reverse Segond fracture.
Examine the fibula head and neck closely. Fractures here can be subtle. Remember that a fracture of the proximal third of the fibula shaft may form part of a Maisonneuve injury: an ankle fracture with a proximal fibular component, so always think about the ankle when you see a proximal fibula fracture.
Now have a look at the patella looking for a lucency that may represent a fracture. Fracture lines can be transverse, vertical or comminuted. Be careful not to confuse a fracture with a normal anatomical variant – a bipartite patella. Here the bone fragment is most commonly seen within the upper outer quadrant of the patella and will be well corticated, rather than a fracture which has sharp margins without a ‘thicker’ cortical layer.
Note that true vertical fractures can be difficult to see on standard projections – oblique and skyline X-Ray views or CT could be used if there is any doubt.
Have a think about the position of the patella however this is better assessed on a lateral view (see below).
Zoom out, have a look at all remaining cortices and look for a bone lesion.
The HBL view is a key projection in assessing acute knee pain and trauma. It is performed with the patient supine, the knee ideally flexed to around 30 degrees although this can be limited by pain. This position allows better visualisation of the joint and is particularly valuable for detecting a lipohaemarthrosis, which strongly suggests an intra-articular fracture even if the fracture line itself is difficult to see.
Let’s go through a review system:
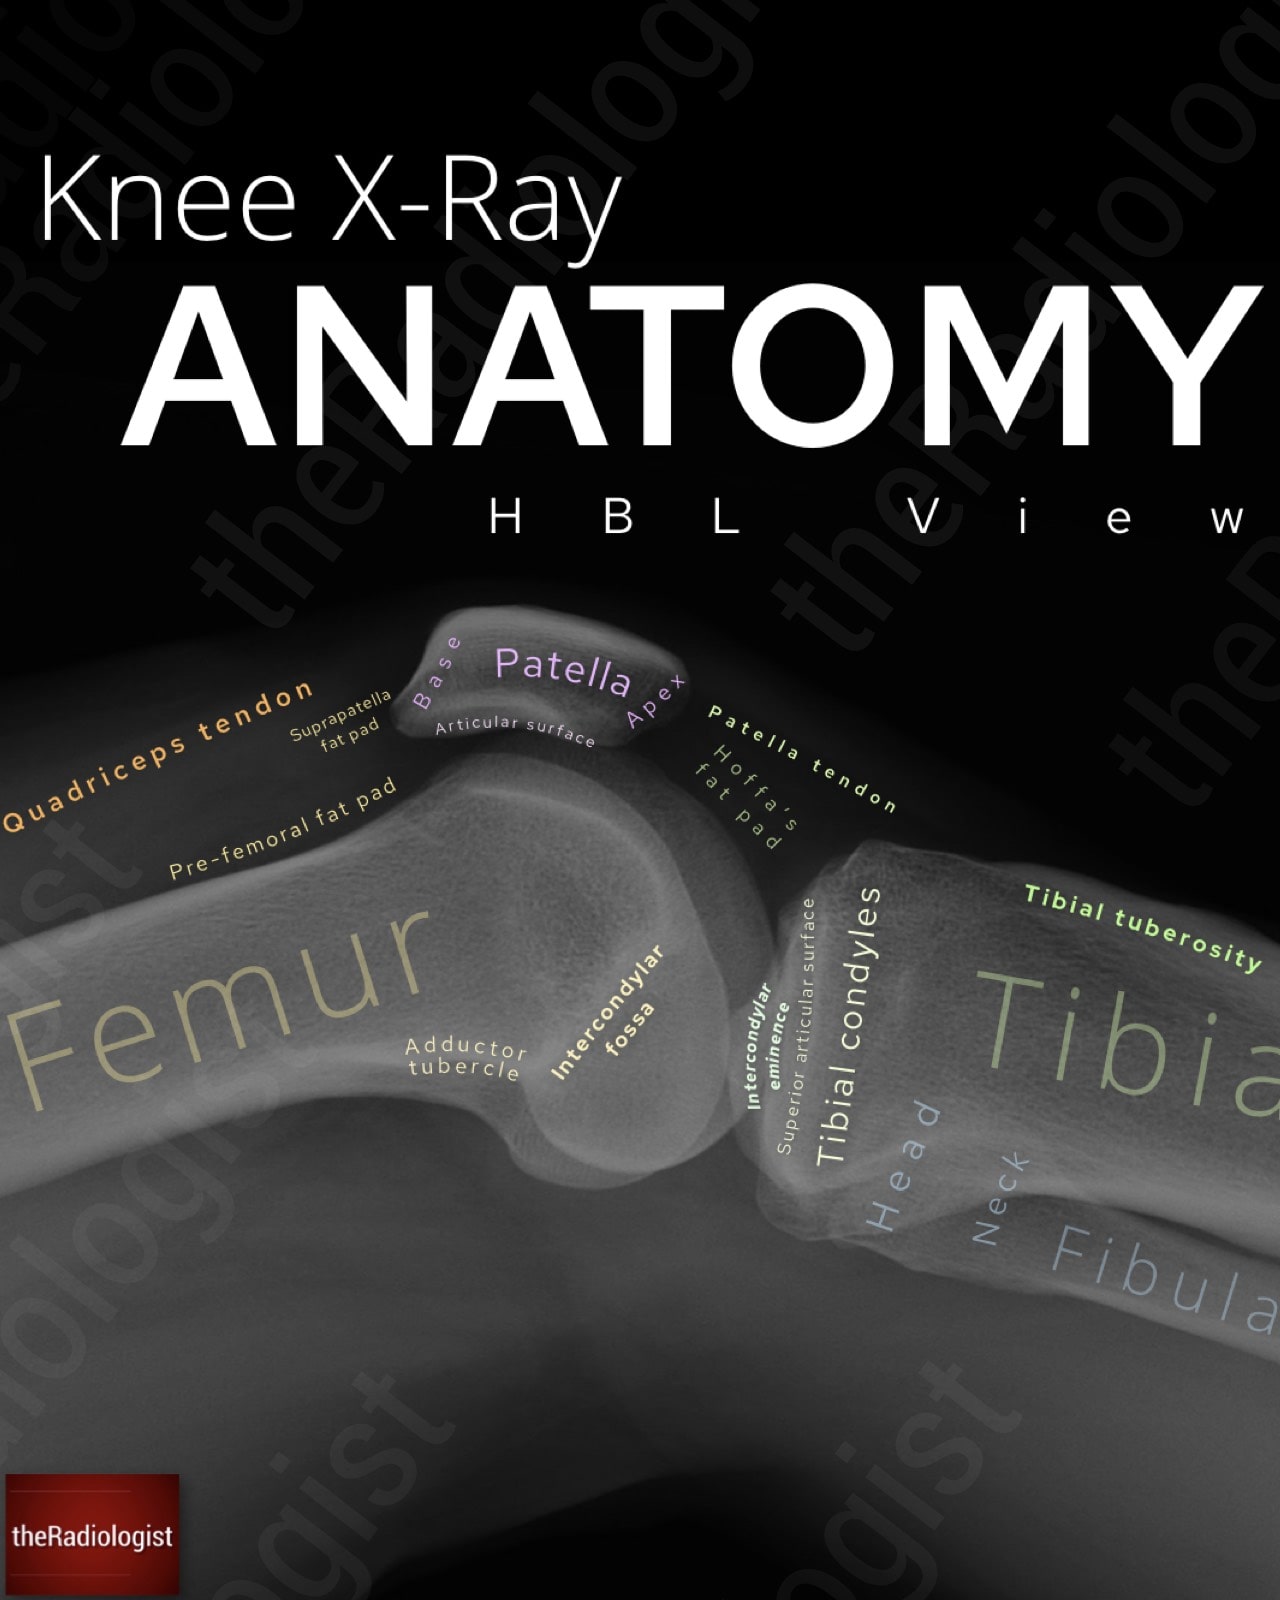
Annotated image of a lateral (HBL view) knee X-Ray
Start with the soft tissues. Look for any soft tissue swelling which may alert you to the site of the injury.
This is the classic finding on the HBL view. It represents escape of fat and blood from bone marrow into the joint space after an intra-articular fracture. Look for layering: fat appears darker (lucent) and floats above the denser blood (more opaque), separated by a straight horizontal fluid–fluid line in the suprapatellar pouch.
Also check for a simple effusion, which may appear as abnormal opacity displacing the prefemoral and suprapatellar fat pads. Even without obvious fat-fluid levels, a large effusion alone should raise suspicion of intra-articular injury in the context of trauma.
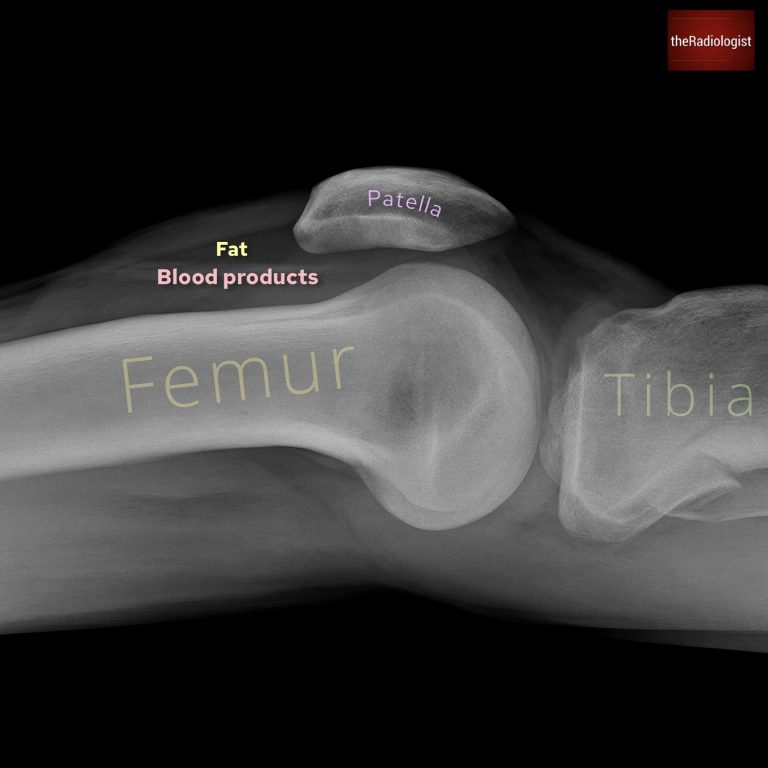
A straight line separating more inferior more opaque blood products and superior lucent fat suggests lipohaemarthrosis and an intra-articular fracture (in this case affecting the proximal tibia).
Next, assess the patella. Look carefully for a fracture line, then check its alignment: does it sit too high or too low?
A patella that rides too high in the context of acute trauma and anterior knee pain could mean a ruptured patella ligament.
The Insall–Salvati ratio is useful here: tendon length (measure from the bottom of the patella to the tibial tubercle) ÷ patella length. This is best measured when the knee is flexed 30°.
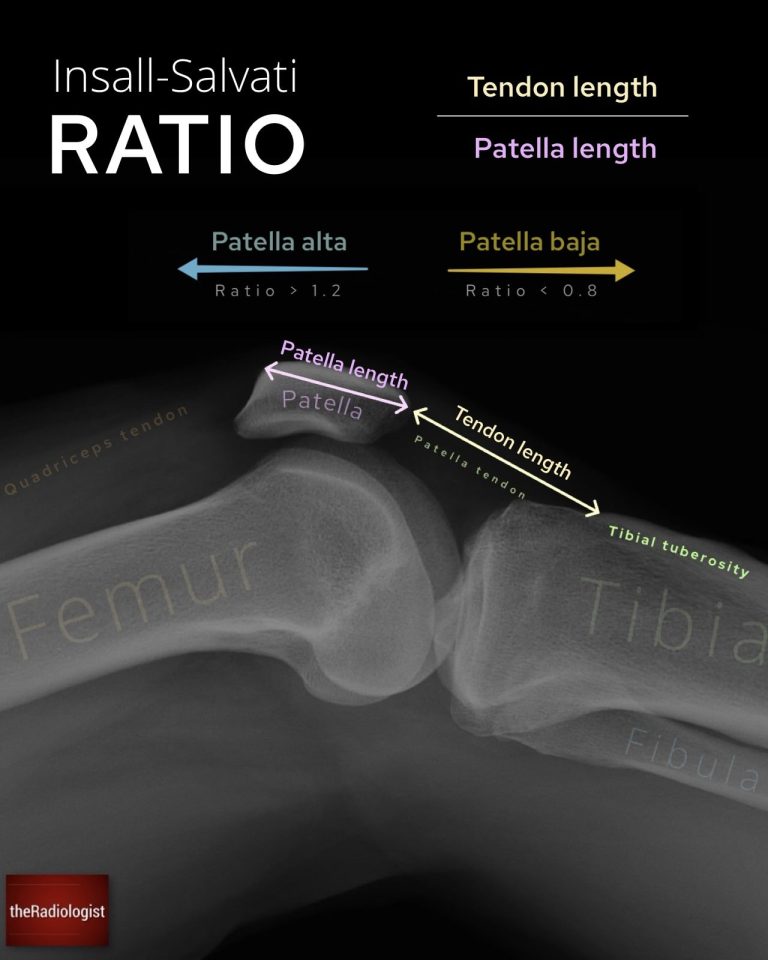
The Insall-Salvati ratio can help decide if the patella is adequately sited.
It can be tricky to tell the femoral condyles apart on a lateral view. A few landmarks help:
The adductor tubercle marks the medial condyle: it is a thickened bony prominence where adductor magnus inserts.
A small anterior notch usually marks out the lateral femoral condyle.
Once you’ve orientated yourself, trace the cortical margins of both condyles for irregularity or a lucent line suggesting a fracture.
Survey the joint space for any loose bone fragments, which may represent an intra-articular fracture, or for calcification within cartilage: a clue to chondrocalcinosis. Although X-Rays are less sensitive than CT or MRI for small fragments or cartilage lesions, spotting them on plain films can change your next steps.
Finish by zooming out and tracing the cortices of all visible bones (femur, tibia, fibula, and patella) from top to bottom. Look for areas of cortical break, abnormal trabecular pattern, or erosion that could represent a bone lesion.
A final broad review of both bone and soft tissue structures helps ensure no subtle injury is missed.
Let’s summarise the above: below you’ll find a checklist to help you when you next review a knee X-Ray.
| Projection | Review area | Notes |
|---|---|---|
| AP | Orientate yourself | Find the fibula – this is the lateral side. |
| Soft tissues | Look for soft tissue swelling or gas locules to help locate the injury. | |
| Alignment and joint spaces | Draw a vertical line down the lateral margin of the femur – should not see more than 5 mm of the tibia to the lateral side of this. Look for joint space narrowing. | |
| Tibial plateau | Look carefully for fracture – lateral tibial plateau affected more often. | |
| ACL injury | Check the intercondylar eminence. Look above the fibula for a Segond fracture. | |
| Proximal fibula | Examine closely for a fracture – proximal third fibula fractures could represent a Maisonneuve injury so check the ankle. | |
| Patella | Look for a fracture – don’t confuse for a bipartite patella (most commonly upper outer quadrant and well corticated). | |
| Final overview | Zoom out and review remaining cortices and look for a bone lesion. | |
| Lateral (HBL) | Soft tissues | Look for soft tissue swelling or gas locules to help locate the injury. |
| Lipohaemarthrosis | Look superior to the patella for fat (more lucent) layering above blood products (more opaque) with a straight interface between the two – this suggests an intra-articular fracture. | |
| Patella | Check for fracture and its alignment. Use the Insall-Salvati ratio to see if the patella is riding high (could be patella tendon injury) or too low (quadriceps tendon injury). | |
| Femoral condyles | Follow closely looking for a fracture. | |
| Joint space | Look for bone fragments or calcification. | |
| Final overview | Zoom out, check remaining cortices and look for a bone lesion. |
Downloaded by 10,000+ healthcare professionals.
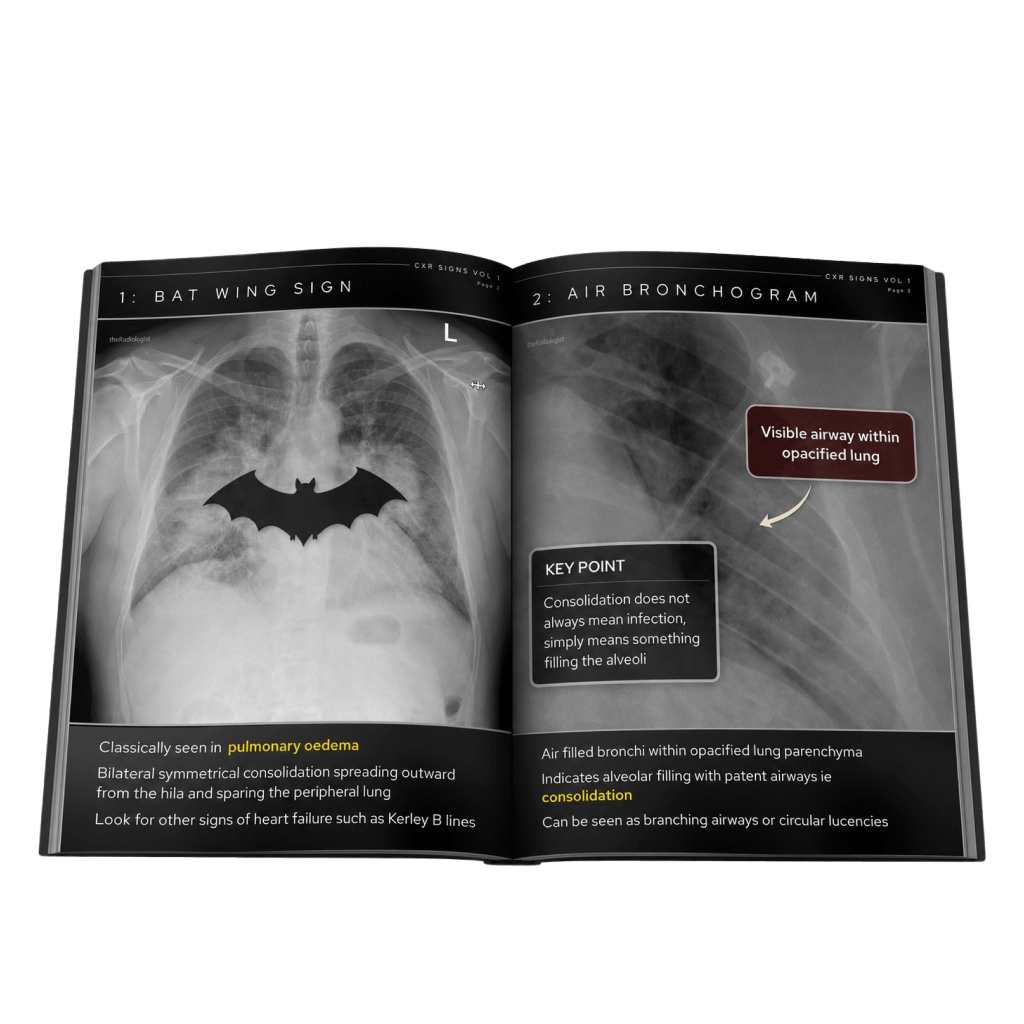
Get 20 annotated chest X-ray signs with clear teaching points and explanations. Written by a Consultant Radiologist, this free guide is designed to help you recognise important findings more confidently when reviewing chest X-Rays.


You’ve got the framework now let’s put it to work. Dive into a related case to see these findings on real images, or explore another guide to build out your systematic approach. That’s where it really starts to stick.
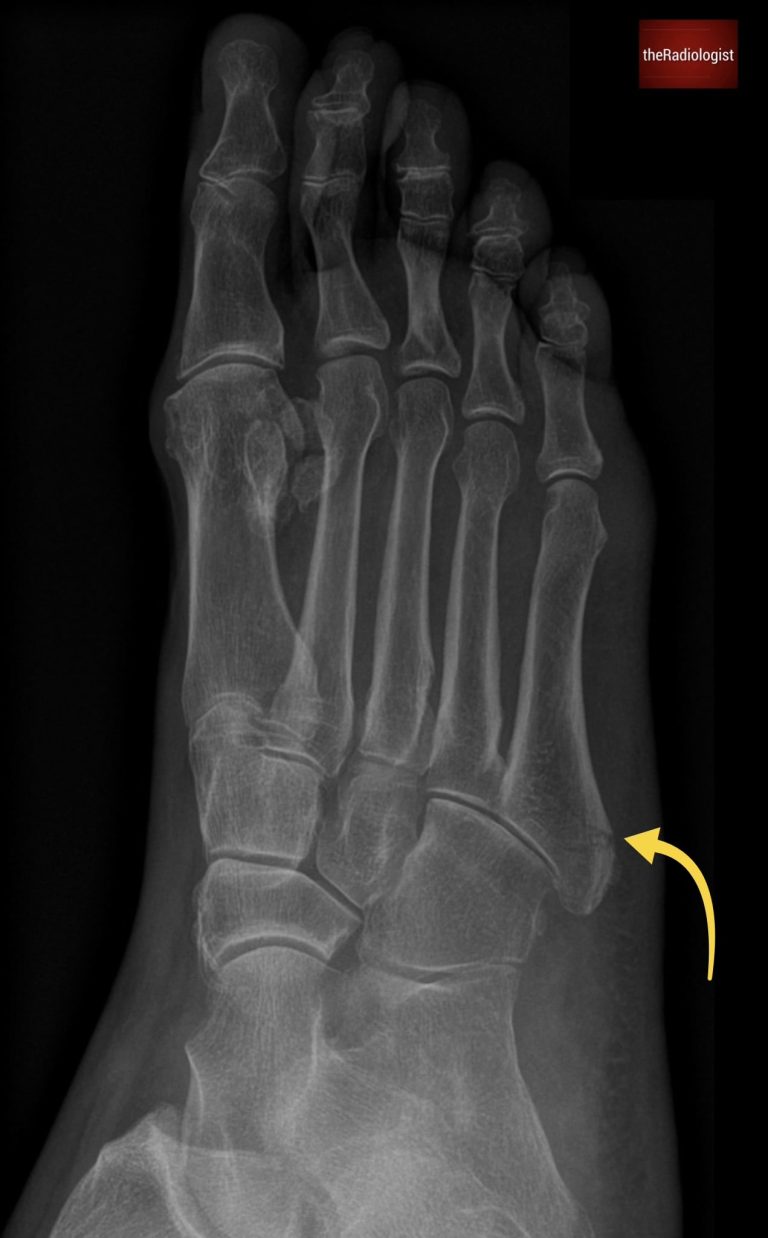
Foot and ankle X-Ray anatomy, views and key review areas
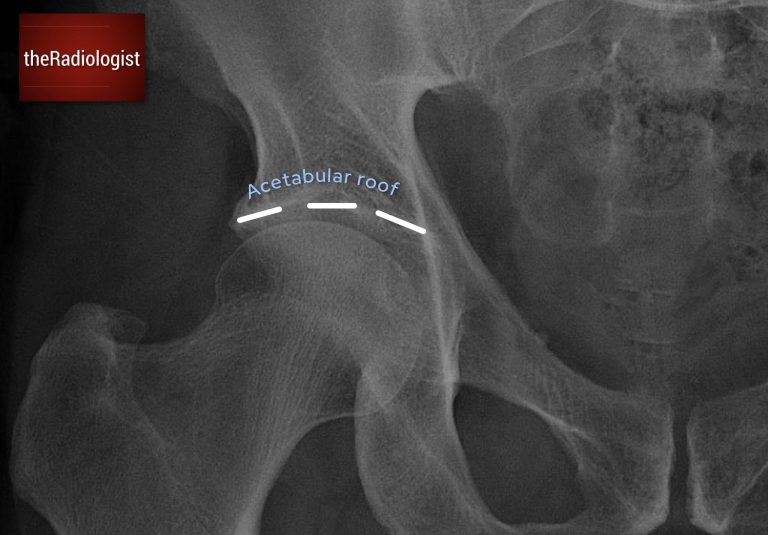
Pelvis X-Ray anatomy, alignment and fracture review areas
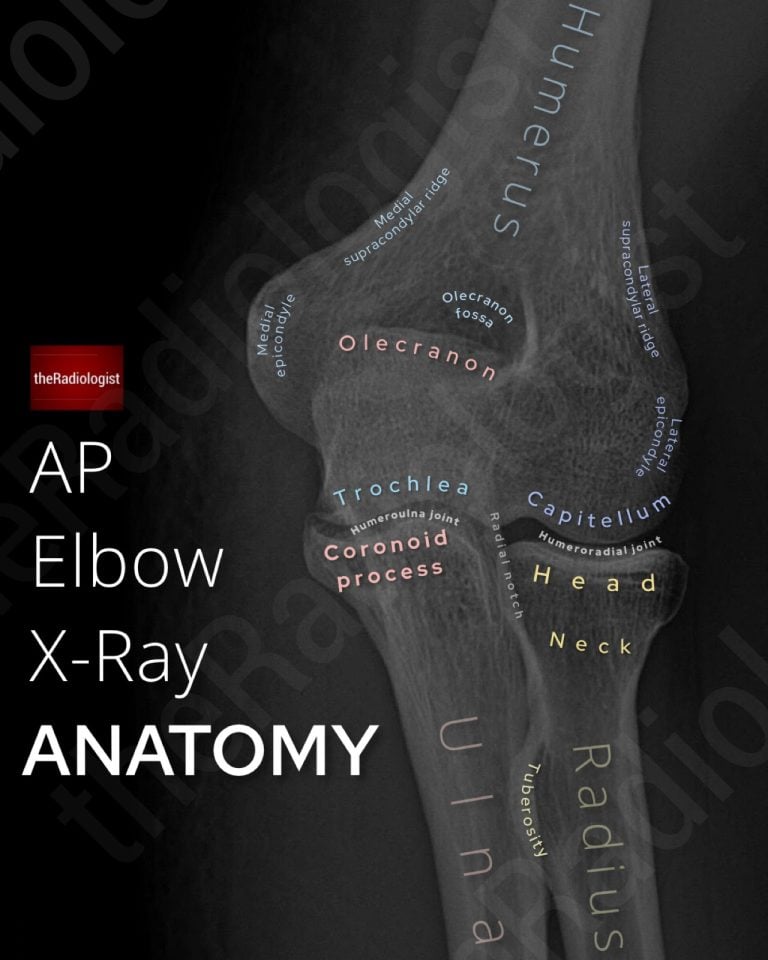
AP, lateral and labelled anatomy for interpretation
We use cookies to make this website work and to understand how it is used. You can accept all cookies, use essential cookies only or manage your preferences.